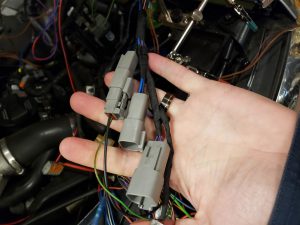
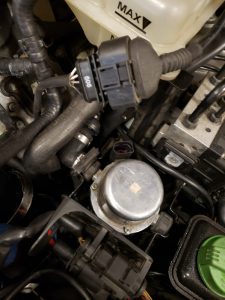
Warning: Private methods cannot be final as they are never overridden by other classes in /home/dh_8ge97g/blog.whosbetterthan.us/wp-includes/class-wp-session-tokens.php on line 69
Page not found – A Little Blog https://blog.whosbetterthan.us Random musings at a random interval Tue, 10 Mar 2020 23:29:34 +0000 en-US hourly 1 https://wordpress.org/?v=5.4.21 Getting wired (again) https://blog.whosbetterthan.us/2020/03/08/getting-wired-again/ https://blog.whosbetterthan.us/2020/03/08/getting-wired-again/#respond Mon, 09 Mar 2020 00:43:37 +0000 http://www.little.org/blog/?p=3194 Continue reading "Getting wired (again)"]]> Taking a chunk of wire out of the harness did improve matters for me, but not quite enough and more needs to come out. This time, however, it’s extra plugs that are being removed.

One of the recommendations on the forums was to create an adapter harness to go between the A4 and A6 plug mapping so you don’t have to cut up the 2.7T harness. This seems good in theory, until you realize you need to cut into the harness upstream of the A6 plugs anyway.  The adapter harness really just ends up being a bunch of extra plastic bulk that won’t fit into the plenum chamber (and you need to make sure that’s closed so the ECU and/or your feet don’t get wet).

Started with the slow process of cutting individual wires on either side of the A6 plugs and immediately reconnecting them. Doing it one at a time made it easier to organize the wires by plug. By grouping the wires together I hope to better bundle them to save space.
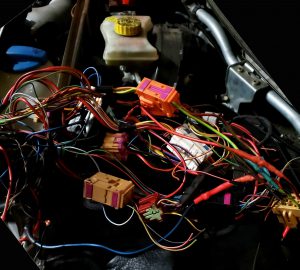
A short 6 hours later the majority of the extra plugs are removed and the wire rearranged. I can now fit the TCU and ECU both into the plenum box. there is, however, still a long way to go to tame the rat’s nest enough that it will fit back into the plenum box.
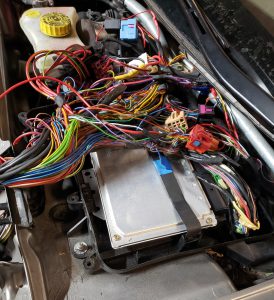
]]>
https://blog.whosbetterthan.us/2020/03/08/getting-wired-again/feed/ 0
Exhausted https://blog.whosbetterthan.us/2020/03/01/exhausted/ https://blog.whosbetterthan.us/2020/03/01/exhausted/#respond Mon, 02 Mar 2020 00:05:17 +0000 http://www.little.org/blog/?p=3199 Continue reading "Exhausted"]]> My new pipes are now fully on the car and mostly tightened down.

Still a bit of straightening to do, but at least now the car can be driven without annoying the neighbors or, more importantly, me (the drone in the cabin was aweful).
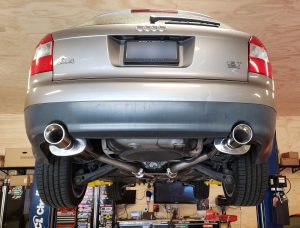
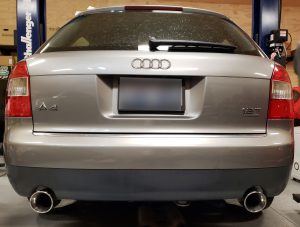
The Magnaflow cat-back system was mostly plug-and-play. A bit of customization was, however, needed.
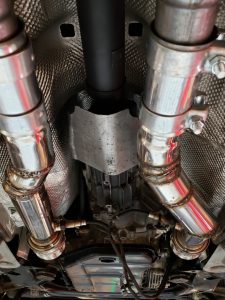
Because my cheap import down pipes wouldn’t fit around the automatic transmission they needed to be cut up. We did the best we could to get them down and out in the correct location, but they were way off. Fortunately they cheap pipes also came with some straight test pipes which I cut mercilessly.
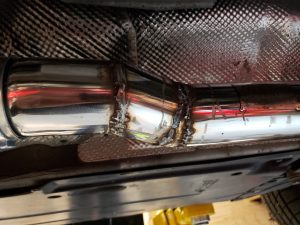
My buddy and I then proceeded to learn how to weld on them. They are super, super ugly, but what the hell. It was a good learning experience and I’m not trying to win any car shows with the work. Besides. These are in place until I swap the automatic for a manual and get a fresh set of down pipes.
]]>
https://blog.whosbetterthan.us/2020/03/01/exhausted/feed/ 0
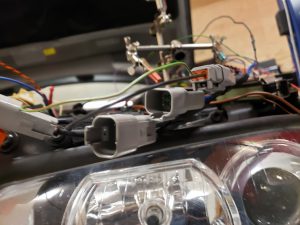
Just a little off the top https://blog.whosbetterthan.us/2019/11/22/just-a-little-off-the-top/ https://blog.whosbetterthan.us/2019/11/22/just-a-little-off-the-top/#respond Sat, 23 Nov 2019 03:19:14 +0000 http://www.little.org/blog/?p=3168 Continue reading "Just a little off the top"]]> Turns out an extra long wiring harness makes it a little hard to close the hood, so after getting some confidence the wiring was reasonably good I took about 4 feet out and added in some connectors so the transmission and engine harnesses weren’t permanently connected.

Hood closes now. Now I just need to figure out how to get the dash computer to play nice with the older transmission control unit. Progress.

]]>
https://blog.whosbetterthan.us/2019/11/22/just-a-little-off-the-top/feed/ 0
The end is nigh https://blog.whosbetterthan.us/2019/10/15/the-end-is-nigh/ https://blog.whosbetterthan.us/2019/10/15/the-end-is-nigh/#respond Tue, 15 Oct 2019 19:31:34 +0000 http://www.little.org/blog/?p=3161 It is getting soooo close. I probably could take the jack stands out and it would move under its own power (stopping might be rough, however, until I figure out the brake booster issue).

Fix brakes, shorten the overly long harnesses and it’s… ready?

]]>
https://blog.whosbetterthan.us/2019/10/15/the-end-is-nigh/feed/ 0
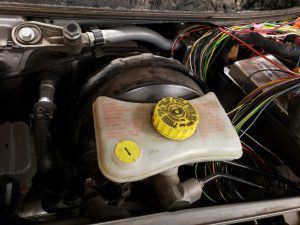
Where did those plugs go? https://blog.whosbetterthan.us/2019/10/14/where-did-those-plugs-go/ https://blog.whosbetterthan.us/2019/10/14/where-did-those-plugs-go/#respond Tue, 15 Oct 2019 01:34:19 +0000 http://www.little.org/blog/?p=3156 Continue reading "Where did those plugs go?"]]> Puzzling through the wiring of the swap and can’t figure out where the connections for the brake booster-related components go.

I could try wiring them manually based on the Bentley diagrams I have, but I think I’ll check first with the forums to see if anyone there has the answer.

Booster pump:
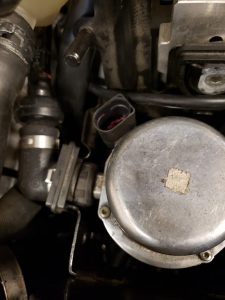
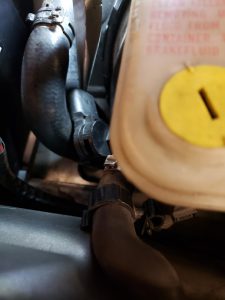
Vacuum vent valve plug on side of brake master. There’s still a wire connected to the fluid level sensor… why would the wire get pulled off the brake vacuum vent?
]]>
https://blog.whosbetterthan.us/2019/10/14/where-did-those-plugs-go/feed/ 0
Brake booster? Not sure where it plugs in? Lose it. https://blog.whosbetterthan.us/2019/10/14/brake-booster-not-sure-where-it-plugs-in-lose-it/ https://blog.whosbetterthan.us/2019/10/14/brake-booster-not-sure-where-it-plugs-in-lose-it/#respond Tue, 15 Oct 2019 00:21:47 +0000 http://www.little.org/blog/?p=3165 There doesn’t seem to be a matching part in the donor A6 and I can’t figure out where in the harness I would plug in the booster. So… it’s coming out.

]]>
https://blog.whosbetterthan.us/2019/10/14/brake-booster-not-sure-where-it-plugs-in-lose-it/feed/ 0
It’s Alive AND mobile! https://blog.whosbetterthan.us/2019/10/12/its-alive-and-mobile/ https://blog.whosbetterthan.us/2019/10/12/its-alive-and-mobile/#respond Sun, 13 Oct 2019 03:21:33 +0000 http://www.little.org/blog/?p=3172 Not only does it fire up, but it moves under its own power. Unfortunately it’s stuck in 2nd or 3rd gear until I get the A6 TCU to play nice with the A4.

]]>
https://blog.whosbetterthan.us/2019/10/12/its-alive-and-mobile/feed/ 0
A4 engine removal – driveshaft unbolted (day 19) https://blog.whosbetterthan.us/2017/10/27/a4-engine-removal-driveshaft-unbolted-day-19/ https://blog.whosbetterthan.us/2017/10/27/a4-engine-removal-driveshaft-unbolted-day-19/#respond Fri, 27 Oct 2017 22:06:31 +0000 http://www.little.org/blog/?p=3104 Continue reading "A4 engine removal – driveshaft unbolted (day 19)"]]> Today I did some small things getting ready to pull the engine and transmission.

First I unbolted the drive shaft and tucked it out of the way.

Next i started working on the bolts holding the driveshafts in place for the front of the car. The bolts are tough, so I’m going to need to come back to these when I have an assistant to stand on the breaks so they don’t rotate.

Time invested – 1 hour

]]>
https://blog.whosbetterthan.us/2017/10/27/a4-engine-removal-driveshaft-unbolted-day-19/feed/ 0
A4 engine removal – starter and AC pulled (day 18) https://blog.whosbetterthan.us/2017/10/22/a4-engine-removal-starter-and-ac-pulled-day-18/ https://blog.whosbetterthan.us/2017/10/22/a4-engine-removal-starter-and-ac-pulled-day-18/#respond Mon, 23 Oct 2017 04:22:36 +0000 http://www.little.org/blog/?p=3112 Continue reading "A4 engine removal – starter and AC pulled (day 18)"]]> Pulled a few more parts off the car today.

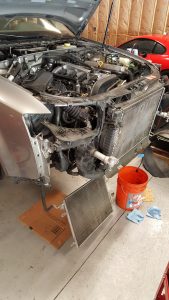
I started with the removing the starter and unbolting the AC compressor.
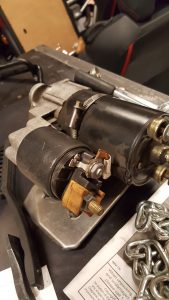
I then moved to the exhaust and worked on getting it separated from the rear of the system.
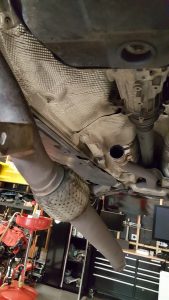
The flex pipe was on its last legs… but no matter, I’m going from 2″ to 3″ exhaust.

Time invested – 2 hours

]]>
https://blog.whosbetterthan.us/2017/10/22/a4-engine-removal-starter-and-ac-pulled-day-18/feed/ 0
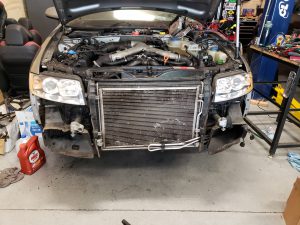
A4 engine removal – front carrier removal (day 17) https://blog.whosbetterthan.us/2017/10/15/a4-engine-removal-front-carrier-removal-day-17/ https://blog.whosbetterthan.us/2017/10/15/a4-engine-removal-front-carrier-removal-day-17/#respond Mon, 16 Oct 2017 05:32:51 +0000 http://www.little.org/blog/?p=3114 Continue reading "A4 engine removal – front carrier removal (day 17)"]]> Today I drained the brake fluid and the remainder of the engine coolant in the process of pulling off the front carrier. I started by swinging the AC radiator down and out of the way.

I drained off the brake fluid an the remainder of the engine coolant from the bottom of the radiator.
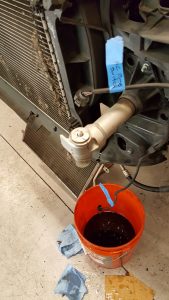
And finally took off the front carrier.
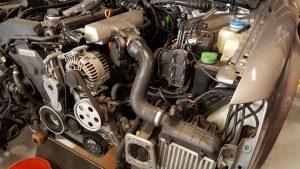
Mmmm… organic!
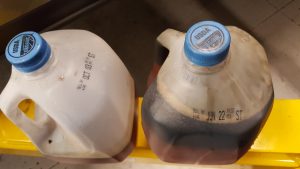
Time invested – 3 hours

]]>
https://blog.whosbetterthan.us/2017/10/15/a4-engine-removal-front-carrier-removal-day-17/feed/ 0